


The process of sewing an American flag is a journey that intertwines craft with national pride. The American flag, with its stars and stripes, is more than a mere symbol; it's a canvas that narrates the story of the nation's journey, its struggles, and triumphs. Crafting this flag involves not just technical skill but also an understanding and respect for the symbolism it carries. Each element, from the stars in the canton to the stripes, holds deep meaning, representing the states and the original colonies.
Project Preparation: Laying the Groundwork for Sewing an American Flag
Before a single stitch is made, thoughtful project preparation is essential to ensure your American flag is both authentic and beautifully constructed. Gather all necessary supplies, including high-quality red, white, and blue fabrics, matching threads, a reliable sewing machine or hand-sewing needles, sharp fabric scissors, measuring tape or ruler, pins, and marking tools like tailor’s chalk. Having all tools and materials at hand streamlines the process and prevents interruptions. Next, devote time to planning the flag’s dimensions. Reference official flag proportions to maintain accuracy and respect for tradition. Carefully measure and record the width and length for each stripe, the union, and the placement of stars, using precise tools to avoid errors. Sketching or mapping out the flag’s layout on paper can help visualize the final product and serve as a guide during assembly. This preparatory phase, centered on organization, measurement, and adherence to established standards, lays a solid foundation for the sewing process, ensuring that your finished flag will be both structurally sound and symbolically meaningful.
Choosing the Right Materials
The choice of fabric is critical when making an American flag. Opting for weather-resistant flag materials ensures that the flag remains vibrant and intact despite exposure to the elements. Materials like heavyweight nylon or polyester are preferred for their durability and ability to withstand sun, wind, and rain. These fabrics ensure that the flag remains a proud emblem of the nation, come rain or shine.
Color integrity is vital in flag making, and thus, using fade-resistant dyes is essential. The colors of the flag, red, white, and blue, need to remain vivid over time. Fade-resistant dyes ensure that the flag retains its bright hues, symbolizing the nation's strength and resilience. The importance of fabric quality and texture in flag-making cannot be overstated. The texture of the fabric should be suitable for both flying freely in the wind and hanging gracefully. A high-quality fabric not only looks and feels good but also contributes to the flag's overall durability, making it a lasting symbol of national pride.
Cutting Fabric Components
Cutting the individual parts of an American flag is a crucial step that lays the groundwork for a flag that is both visually accurate and symbolically respectful. Precision in this stage ensures that the stripes and union (blue field) are true to the flag’s proportions and ready for seamless assembly.
-
Measuring and Marking the Stripes: Begin by measuring and marking the fabric for the stripes. The American flag consists of thirteen stripes, seven red and six white, each of equal width. Use a ruler or measuring tape to mark the width and length of each stripe according to the flag’s overall dimensions. Double-check your measurements before making any cuts, as even slight inaccuracies can impact the flag’s symmetry and appearance. Mark the lines with tailor’s chalk or a washable fabric marker for clear, visible guides.
-
Cutting the Stripes with Precision: Cut each stripe along the marked lines using sharp fabric scissors or a rotary cutter for clean, straight edges. Lay the fabric flat on a smooth surface to prevent shifting or bunching, which can lead to uneven edges. Maintain steady hands and consistent pressure while cutting to ensure uniformity across all stripes.
-
Measuring and Cutting the Union (Blue Field): Next, measure and cut the union, also known as the blue field, which sits in the upper left corner of the flag. The union’s size should be proportional to the flag and typically covers the height of seven stripes and a specified portion of the flag’s length. Use a template or ruler to mark the dimensions carefully on your blue fabric. Accurate cutting of the union is essential for achieving the correct alignment with the stripes and for the proper placement of the stars.
-
Organizing Cut Components for Assembly: After cutting all components, organize the stripes and unions in their intended order. Lay out the pieces on a flat surface, alternating red and white stripes, and position the union at the top left. This step provides a visual check for accuracy, allowing you to confirm that all pieces are the correct size and shape before sewing. Proper organization at this stage reduces confusion during assembly and helps ensure a smooth, efficient construction process.
By dedicating time and attention to the cutting process, you set the foundation for a flag that is both authentic and durable. Accurate, well-prepared fabric components make the subsequent sewing steps more manageable and contribute significantly to the flag’s final appearance and longevity.
Flag Assembly
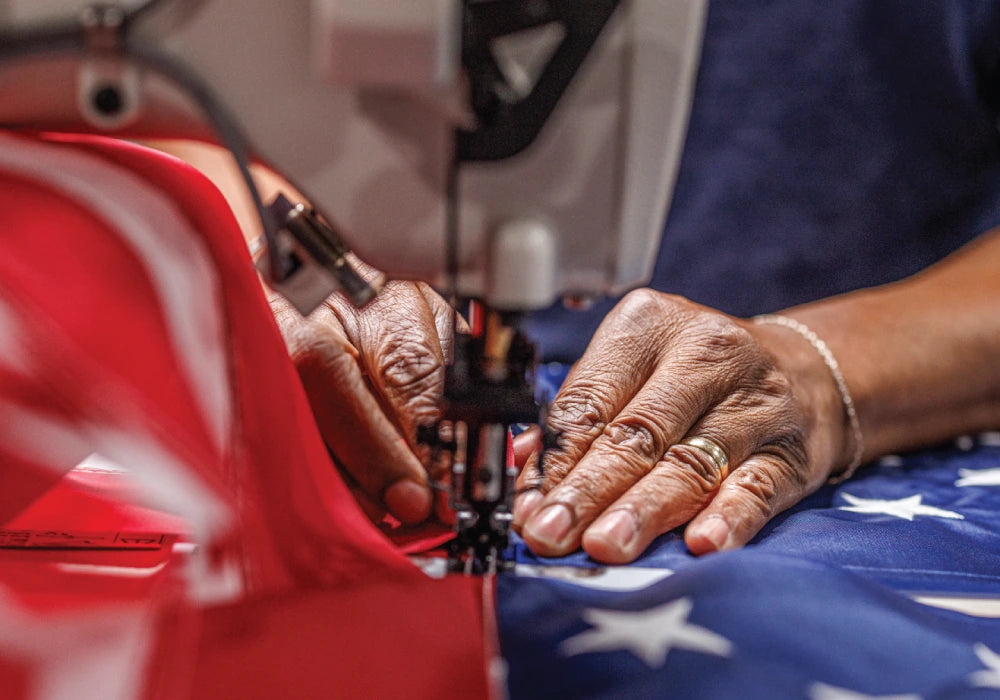
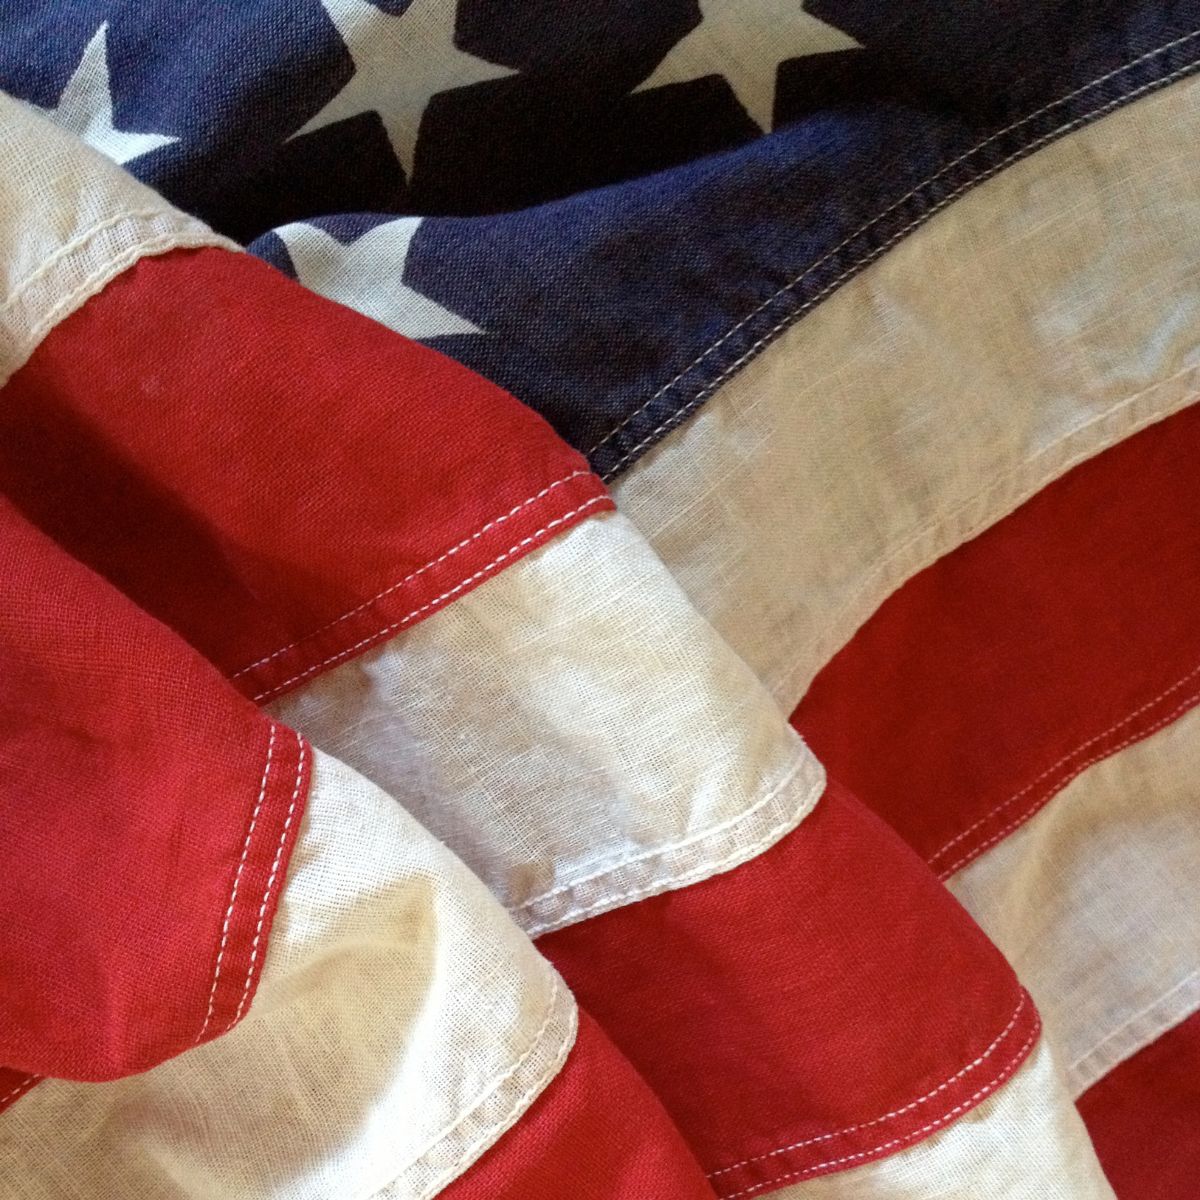
Knowing how to sew the cut components together to construct the flag includes attaching the stripes and the union. One of the foundational elements of flag durability is creating sturdy seams. Strong seams are crucial for preventing fraying and ensuring the flag holds together under various conditions. Techniques like double-stitching or reinforced hemming can significantly enhance the flag's durability, making it resilient against wear and tear.
The hoist edge of the flag, being the most vulnerable to stress, requires extra reinforcement. This can be achieved through heavy-duty sewing techniques, such as using multiple layers of fabric or adding a canvas header. Reinforcing this edge ensures that the flag remains secure when flown, reducing the likelihood of damage over time.
In the crafting process, ensuring accurate alignment of stars and stripes is critical for the flag's authenticity and aesthetic appeal. The stars must be uniformly arranged in a precise pattern, and the stripes need to be straight and of equal width. Alignment accuracy is not just about visual appeal but also about respecting the flag's symbolic importance. When sewing the flag, using UV-resistant threads is advisable. These threads are specifically designed to withstand sunlight exposure without degrading. Using UV-resistant threads helps maintain the flag's structural integrity and appearance, ensuring that it continues to display its colors proudly even after prolonged sun exposure.
Crafting the Canton and Stars
Crafting the canton and stars of an American flag is a process filled with symbolic significance and requires a high level of precision. Below is the method for crafting the canton and stars:
-
Measure the Canton Accurately: Ensure the canton's dimensions comply with the United States Flag Code.
-
Select the Right Fabric: Choose a sturdy, color-fast fabric for the canton to maintain its deep blue color.
-
Cut Stars Precisely: Use a template to cut out 50 uniform stars.
-
Layout Stars Correctly: Arrange the stars in the specified pattern, ensuring even spacing.
-
Secure Stars with Appliqué: Sew each star with care, using techniques that prevent fraying and ensure longevity.
-
Inspect for Symmetry: After attaching the stars, check the canton for symmetry and alignment.
The canton and stars are more than just elements of design; they are embodiments of the American spirit and values. Crafting them with precision and care is not just about following guidelines; it's about honoring the flag and all it represents. As mentioned before, the appliqué stars technique is a meticulous method used in flag-making. This involves cutting out individual stars and sewing them onto the canton. Each star must be precisely cut and carefully positioned. The appliqué process ensures that the stars are not only visually prominent but also securely attached.
Techniques for Stripes and Overall Assembly
When constructing the stripes of the flag, sewing straight, clean lines is essential. The stripes, representing the original thirteen colonies, require precision to ensure they are uniform in width and perfectly parallel. Aligning the stripes with the canton is a critical step in flag assembly. The red and white stripes must meet the canton seamlessly, without any misalignment or gaps. This requires careful measurement and adjustment during the sewing process to ensure that the transition between the canton and stripes is flawless.
In flag-making, there's a choice between heavy-duty machine stitching and hand-sewing flag methods. Machine stitching offers strength and uniformity, ideal for creating durable seams, especially on larger flags. Hand sewing, while more time-consuming, allows for greater control and precision in detail work, such as attaching stars or making fine adjustments.
Ensuring overall symmetry and balance in the flag is crucial. The flag must be proportionate, with all elements, the canton, stars, and stripes, harmoniously aligned and sized. This symmetry is not just aesthetically pleasing but also a representation of the balance and equality that the flag symbolizes.
Finishing Touches and Details
Hemming the edges of the flag is an important finishing touch. The hemming technique used should provide a clean finish while adding to the flag's durability. A double-fold hem is commonly used for its strength and neat appearance, helping to prevent fraying and wear over time. Adding grommets to flags is a practical aspect of flag-making, facilitating easy and secure hanging. Grommets should be evenly spaced and firmly attached to the flag's hoist edge.
A final inspection for quality is essential before a flag is deemed complete. This inspection includes checking for any missed stitches, uneven seams, or misaligned elements. Providing maintenance and care tips for the flag is crucial for its longevity. This includes instructions on proper cleaning, storage, and handling. Educating flag owners on how to care for their flag ensures that it remains a dignified symbol of the nation for years to come.
Care and Etiquette
Once you have completed your DIY American flag, caring for it properly and displaying it with respect are essential steps in honoring both your craftsmanship and the flag’s more profound significance. The American flag is a revered national emblem, and long-standing traditions and the United States Flag Code guide its treatment. To maintain your sewn flag’s vibrant appearance and structural integrity, regular cleaning is recommended. Use a mild detergent and lukewarm water to gently wash the flag, avoiding harsh chemicals or bleach that could fade the colors or weaken the fabric. Always check the manufacturer’s care instructions for your specific fabric type. After washing, allow the flag to air dry completely before storing or displaying it again, as dampness can cause mildew or fabric deterioration. Inspect your flag regularly for signs of wear, such as fraying edges or loose seams, particularly along the hoist edge and corners. Promptly repair minor damage to prevent further deterioration—reinforcing seams or hemming edges as needed. Suppose the flag becomes too worn or tattered to represent the nation respectfully. In that case, it should be retired in a dignified manner, such as by burning in a private, respectful ceremony, as outlined in the Flag Code.
Displaying your flag correctly is equally important. The flag should always be flown with the union at the peak of the staff, except when flown at half-staff to honor and mourn. When displayed against a wall, either vertically or horizontally, the union should be uppermost and to the observer’s left. The flag should never touch the ground, floor, or water, and it should be raised briskly and lowered ceremoniously. When not in use, fold the flag neatly, traditionally, into a triangular shape with only the union visible. Store it in a clean, dry place away from direct sunlight to prevent fading. Avoid displaying the flag during inclement weather unless it is made from weather-resistant material. The flag should never be used as drapery, clothing, or for advertising purposes, and it should not have any mark, insignia, or drawing placed upon it.
Crafting an American flag is a powerful way to connect with the nation's heritage and express patriotism. It requires a blend of technical skills, knowledge of flag etiquette, and a profound respect for the symbolism involved. Whether it's a flag flown on national holidays, displayed in public spaces, or hung in homes, a handcrafted American flag serves as a lasting tribute to the nation's enduring spirit and values. Made with pride and respect, the perfect American flag awaits you at Allegiance. As makers, caretakers, and bearers of this emblem, we carry on a legacy that is as vibrant and resilient as the flag itself.