


The American flag is more than just a national emblem; it embodies the values, history, and spirit of the United States. Over time, these flags may become tattered or faded, but their significance remains undiminished. American flag restoration is not just about repairing a piece of cloth; it's about preserving a symbol of national pride and heritage. Taking the time to restore an old flag reflects a deep respect for what it represents and a commitment to maintaining its dignity.
Preparing for Flag Restoration
When preparing for flag restoration, gathering the right materials is key. This includes finding fabrics that closely match the original in terms of texture and weight. It’s also important to select durable, suitable threads and other repair materials for the flag’s material. Careful selection of materials ensures that the restored flag not only looks good but also withstands future wear and tear.
An essential part of restoration is matching fabrics and colors. The goal is to make the repairs as seamless as possible, maintaining the flag's original appearance. This might involve sourcing specific types of fabric or using specialized dyes to accurately match the flag's colors. Attention to these details is crucial in preserving the flag's authentic look and ensuring that the repairs do not stand out. Having the right tools on hand is crucial for effective flag repair. This includes needles, threads, scissors, fabric glue, and possibly a sewing machine, depending on the extent of the damage. The tools should be appropriate for the fabric type and the repair work needed, ensuring precision and care during the restoration process.
Setting up a dedicated workspace for American flag restoration is important. The space should be clean, well-lit, and spacious enough to spread out the flag. A flat surface is essential for assessing the damage and carrying out the repairs. Organizing the workspace helps in carrying out the restoration process efficiently and respectfully.
Assessing and Evaluating Flag Damage
Evaluating the condition of an American flag is a vital first step before considering any restoration or repair. Begin by laying the flag flat on a clean, well-lit surface, ensuring all parts are visible for a thorough inspection. Carefully examine the entire flag, starting with the fabric itself. Look for common signs of wear such as tears, holes, fraying along the edges, thinning fabric, and areas where the material feels weak or brittle. Pay close attention to high-stress points, including the corners, seams, and the area around the grommets or pole sleeve, as these are often the first to show signs of damage due to repeated handling and exposure to the elements. Assess the color integrity by noting any fading, discoloration, or stains, especially on the red and blue sections, which are more prone to sun damage. Uneven fading patterns can indicate exposure to sunlight or moisture; understanding the source of damage can help determine the best restoration approach.
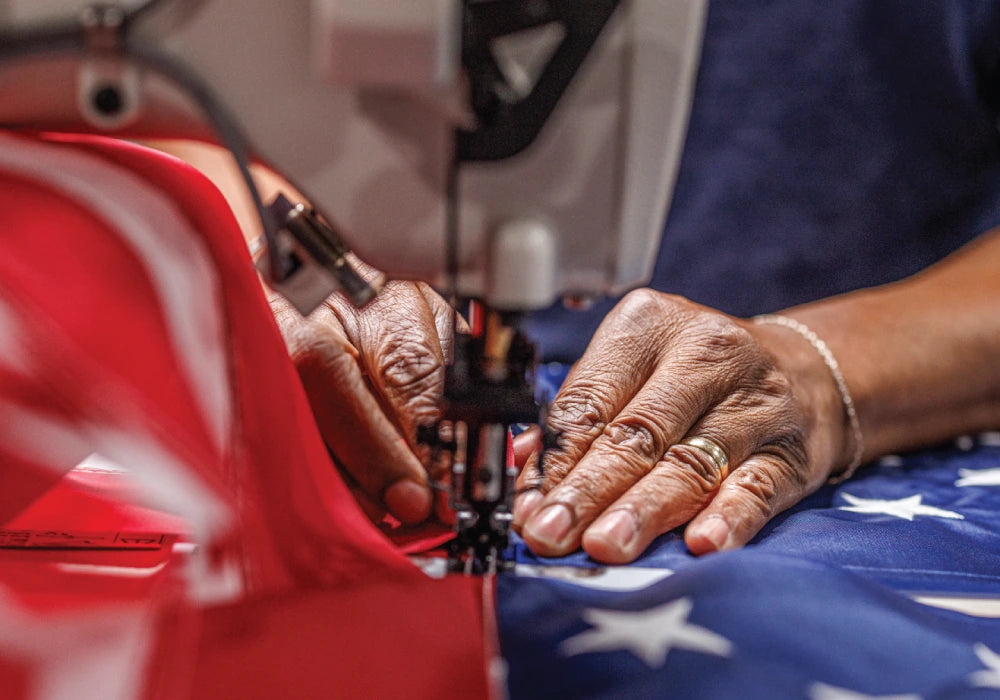
Next, evaluate the stitching throughout the flag. Check for loose, broken, or missing threads, particularly along the stripes and around the stars. Weak or unraveling seams may require reinforcement to prevent further deterioration. If the flag features appliquéd or embroidered stars, inspect these closely for signs of detachment or fraying. Documenting the types and locations of damage, such as by taking photographs or making notes, helps ensure that all issues are addressed during the repair process and assists in maintaining the flag’s original proportions and appearance.
It is also essential to consider the material composition of the flag. Older flags are often made from natural fibers like cotton or wool, while modern flags typically use synthetic materials such as nylon or polyester. The type of fabric influences both the nature of the damage and the appropriate repair techniques. For example, natural fibers may be more susceptible to rot and require gentle handling, while synthetics may show melting or fraying from heat exposure.
Once all damage has been identified and documented, determine whether the flag is a candidate for restoration or if it is beyond repair. Minor issues like small tears, frayed edges, or localized fading can often be addressed with patching, re-hemming, or color-safe touch-ups. However, extensive fabric loss, severe structural weakness, or irreparable staining may indicate that retirement is the most respectful course of action.
Restoration Techniques
Restoration techniques for an American flag are as much about preserving history as they are about repairing fabric. Below are important restoration techniques to be followed:
- Assess the Damage: As mentioned, a thorough assessment is the foundation of any responsible flag restoration project. This step involves more than a quick visual scan. The flag should be laid flat in good lighting so all areas can be examined evenly, including corners, seams, the canton, and high-stress points near grommets or sleeves. Small pinholes, weakened fabric, or early-stage fraying often signal deeper structural issues that will worsen if ignored. Fading patterns can also reveal whether damage is caused primarily by UV exposure, moisture, or improper storage. Understanding the source of deterioration helps determine whether restoration is appropriate or whether retirement may be the more respectful option. Documentation during assessment is valuable, especially for historically significant flags, as it creates a reference point for future care. Measurements, photographs, and written notes ensure repairs remain proportional and do not unintentionally alter the flag’s original dimensions or design. A careful assessment also prevents over-restoration, which can compromise authenticity.
- Select Matching Materials: Fabric weight, weave, fiber content, and color tone must closely match the original construction to avoid uneven wear or visual inconsistency. Using incompatible materials can accelerate deterioration, as mismatched fabrics often respond differently to tension, moisture, and temperature changes. For older or historically significant flags, natural fibers may be necessary to maintain authenticity, while modern outdoor flags may require UV-resistant synthetics to ensure durability. Thread selection is equally important. The thread should be strong enough to reinforce weakened areas without cutting into surrounding fabric, which can happen when overly rigid materials are used. Color matching should account for natural aging, not just original factory hues, so repairs blend rather than stand out. Testing materials on a concealed area helps confirm compatibility before permanent stitching begins. Proper material selection ensures repairs age at a similar rate to the rest of the flag, preventing new stress points from forming.
- Patching with Precision: Patches should be cut precisely to the damaged area, following the grain of the fabric whenever possible to maintain natural movement and tension. Oversized patches may seem protective, but often introduce stiffness that pulls against surrounding material, leading to new tears over time. Stitching should be evenly spaced and secured without puckering, which can distort the flag’s shape when displayed. Hand stitching is often preferred for delicate or older flags because it allows greater control and reduces stress on weakened fibers. Patch placement should respect the flag’s design, ensuring stars, stripes, and proportions remain visually consistent. In some cases, backing patches placed behind the damaged area offer reinforcement without altering the front-facing appearance. This technique is especially useful when preserving the flag’s original visual presentation is a priority. Precision patching restores function while minimizing visual intrusion, ensuring repairs support the flag rather than drawing attention to themselves. When done correctly, patches become discreet reinforcements that extend usability without compromising dignity.
- Reinforcing Seams: Seams are among the first areas to fail due to repeated movement and environmental exposure. Reinforcing them requires strengthening existing stitch lines rather than replacing them entirely whenever possible. This approach maintains the original construction while adding support where the fabric has weakened. Reinforcement stitching should follow the original seam path closely to preserve alignment and balance. Using weather-resistant thread helps protect against future moisture damage, especially for flags intended for outdoor display. Care must be taken to avoid excessive stitching, which can perforate fabric and create new tear lines. In some cases, adding a narrow reinforcement strip along the seam’s underside provides additional strength without altering the visible surface.
- Color Restoration: Fading is a natural result of exposure and does not automatically indicate neglect. Any attempt to restore color must prioritize fabric safety, using only color-safe dyes or archival markers designed for textiles. Testing on an inconspicuous area is essential to ensure the color bonds evenly and does not bleed or stiffen the fabric. Restoration should focus on areas where fading disrupts the flag’s overall visual coherence, such as uneven stripes or a significantly dulled canton. Over-saturation should be avoided, as it can create stark contrasts that appear unnatural. In many cases, subtle blending is more appropriate than full recoloring. Color restoration should never obscure original stitching or construction details, particularly on older flags. When applied thoughtfully, limited color restoration can enhance legibility and presentation while respecting the flag’s age and history.
- Trimming Frayed Edges: Frayed edges pose a serious risk to the structural integrity of a flag, as loose threads can unravel rapidly under wind stress. Trimming must be done with precision to remove damaged fibers without shortening the flag excessively or altering its proportions. Once fraying is addressed, re-hemming provides a clean, reinforced edge that resists further unraveling. The hem width should match the original as closely as possible to maintain balance. Stitching must be secure yet flexible, allowing the flag to move naturally during display.
Each step in the restoration process is carried out with a deep sense of reverence for the flag. This meticulous approach not only restores the flag's physical appearance but also honors its symbolic value. It’s a process that requires patience, skill, and a profound respect for one of the nation's most cherished symbols.
Cleaning and Maintenance of Flags
Maintaining the cleanliness of an American flag is an integral part of its care. Proper cleaning methods help to preserve the flag's colors and fabric. It’s important to identify the flag's material and choose a cleaning method that is gentle yet effective. For some flags, specialized cleaning solutions may be necessary to avoid damage.
For many flags, gentle hand washing techniques are the safest and most effective cleaning method. This involves using mild detergent and lukewarm water, and gently agitating the fabric to remove dirt and grime. Hand washing allows for careful handling of the flag, minimizing the risk of damage during the cleaning process.
If machine washing is deemed suitable, it’s crucial to take steps to avoid damage during machine washing. This includes using a gentle cycle, placing the flag in a protective mesh bag, and using mild detergents. It’s also important to avoid washing the flag with other items to prevent color transfer. Proper drying and ironing are important to maintain the flag's appearance. The flag should be air-dried in a well-ventilated area, avoiding direct sunlight, which can cause fading. If ironing is necessary, it should be done in a low-heat setting with a protective cloth between the iron and the fabric to prevent heat damage.
Flags Beyond Repair: Respectful Retirement
When a flag is beyond repair, it’s important to retire it respectfully. Understanding retirement ceremonies is crucial in this process. These ceremonies are a formal way to honor the flag as it is decommissioned. They often involve ceremonially folding the flag and saying a few words about its significance. Engaging local veterans' organizations can help retire a flag. Many of these organizations conduct flag retirement ceremonies and can offer guidance on the proper procedures.
Understanding the disposal ethics and practices associated with flag retirement is essential. The United States Flag Code provides guidelines for proper flag disposal, usually by burning in a dignified manner. Following these guidelines ensures the flag's retirement is conducted with the utmost respect.
The process of caring for, restoring, and retiring the American flag goes beyond mere fabric repair or cleaning. It's a profound expression of patriotism and a demonstration of respect for an important national symbol. Through regular maintenance, respectful restoration, and dignified retirement, individuals and communities express their reverence for the flag and what it stands for. Encouraging and practicing these respectful behaviors not only preserves the physical condition of the flag but also reinforces the values it embodies. As we engage in these practices, we pass on a legacy of respect and pride for our national symbols to future generations. Choose a USA-made American flag from Allegiance and continue flying a symbol crafted with the respect and quality it deserves.