


Sewing an American flag is more than just a crafting project; it's a journey through history. The American flag, with its stars and stripes, represents the nation's struggles and triumphs. Each element, from the colors to the star arrangement, carries deep significance. For beginners, understanding this historical context adds meaning to every stitch. It transforms a simple sewing activity into a tribute to the nation's heritage. As you sew your flag, you're not just creating a symbol. You're connecting with the story of a nation that has evolved over centuries. This article will discuss the methods and sequence for assembling the cut pieces into the flag's main body.
Preparing for the Project
Before diving into the project, it's crucial to understand the American flag dimensions. The flag's proportion is governed by executive orders and laws, ensuring uniformity. Typically, the flag's length is 1.9 times its height. The union (the blue field with stars) should cover seven stripes and extend to 40% of the flag's length. Each stripe is of equal width, and the stars are arranged in nine rows of alternating five or six stars. Knowing these dimensions is essential, as they guide the entire flag-making process, from cutting the fabric to the final assembly.
The next step in sewing an American flag is gathering the right materials. You'll need fabric in red, white, and blue, thread to match, a needle or sewing machine, scissors, a ruler or measuring tape, and grommet tools for the finishing touches. Selecting quality materials is crucial as the flag is a symbol of national pride and is often exposed to outdoor conditions. Ensure the fabrics are durable, colorfast, and suitable for both indoor and outdoor use. With the right materials in hand, you're set to start the rewarding process of flag-making.
The choice of fabric is pivotal in American flag-making materials. Traditionally, flags are made from cotton, nylon, or polyester. Cotton flags have a classic look and feel, but may not endure harsh weather well. Nylon is lightweight, dries quickly, and is suitable for outdoor use, while polyester is the most durable and ideal for high-wind areas. Consider where you'll display your flag when selecting the fabric. Remember, the fabric should represent the flag's significance, so choose one that maintains its integrity and appearance over time. Precise measurement and cutting are foundational in flag-making. For this, you need a ruler or a measuring tape, fabric scissors, and possibly a rotary cutter for clean, straight cuts. A cutting mat can also be helpful to protect your work surface. Measurement accuracy is vital, especially when cutting stripes for the flag and the union. Each stripe and the union's dimensions must adhere to the official flag proportions to ensure an authentic and respectful representation of the flag.
Cutting the Stripes and Union
The process of accurately measuring and cutting the fabric pieces is needed for the flag's components. Precision is crucial, as it ensures the flag's proportions match the standard American flag dimensions. Use a clear ruler or a measuring tape, and mark your measurements carefully on the fabric. This step is about more than just getting the right size; it's about honoring the flag's design, which has remained consistent throughout history. Double-check your measurements before cutting to ensure each stripe and the union area are exactly as they should be.
When it comes to cutting stripes for the flag, achieving straight lines is essential for a professional look. A good tip is to use a rotary cutter along with a metal ruler or a straight-edge guide. This can significantly improve the accuracy of your cuts compared to using standard scissors. Lay the fabric on a flat surface, and make sure it's smooth and wrinkle-free before you start cutting. Remember, steady hands and focused attention yield the best results, ensuring your stripes are uniformly cut and visually appealing.
Preparing the union, the blue field of the flag requires attention to detail to ensure the correct dimensions. The union is a key component of the flag and must be sized accurately to align with the established standards. It should occupy the proper width and align with the top seven stripes of the flag. To ensure precision, use a template or a detailed guide that specifies the exact measurements. This preparation is fundamental to achieving an authentic and respectful representation of the American flag.
Once all the pieces are cut, organizing them for assembly is the next critical step. Lay out the stripes in the correct order - alternating red and white - and position the union in the top left corner. This layout will give you a visual representation of how the flag will look once assembled. It's a good practice to label each piece, especially if you're new to flag-making, to avoid any confusion during the sewing process. Proper organization at this stage simplifies the upcoming steps, paving the way for a smooth and enjoyable flag-making experience.
Stripes and Assembly Techniques
Sewing the stripes of an American flag requires precision and attention to detail to ensure the flag’s iconic appearance and symbolic integrity. Proper alignment and secure attachment of each stripe are essential for achieving a durable result. Here are four key methods to help you sew the stripes accurately and with confidence:
- Pin and Align Stripes for Accuracy: Carefully align each stripe edge-to-edge, using pins or fabric clips to hold them together before sewing. Begin with the top red stripe and alternate colors, ensuring that the edges are flush and the stripes remain parallel throughout the process. This prevents shifting and maintains the flag’s symmetry.
- Sew with a Consistent Seam Allowance: Use a straight stitch, either by hand or with a sewing machine, to join the stripes along their long edges. Maintain a consistent seam allowance, typically about 1/4 inch, to ensure uniformity across all stripes. Backstitch at the beginning and end of each seam to reinforce the attachment.
- Press Seams Flat After Sewing: Press each seam flat with an iron after sewing to create crisp, smooth transitions between stripes. This not only enhances the flag’s appearance but also helps the stripes lay flat, reducing bulk and making subsequent steps like attaching the union easier and more precise.
- Check Alignment Throughout the Process: Regularly check the alignment of the stripes as you work, especially after attaching several together. Lay the flag flat and use a ruler or straight edge to confirm that the stripes remain parallel and the overall piece is square. Adjust as needed before proceeding to the next stripe.
By following these structured methods, you’ll ensure that the stripes of your American flag are sewn with accuracy and care. This attention to detail not only honors the flag’s design but also results in a finished product that is both beautiful and long-lasting.
Techniques for Crafting the Blue Canton and Applying the Stars
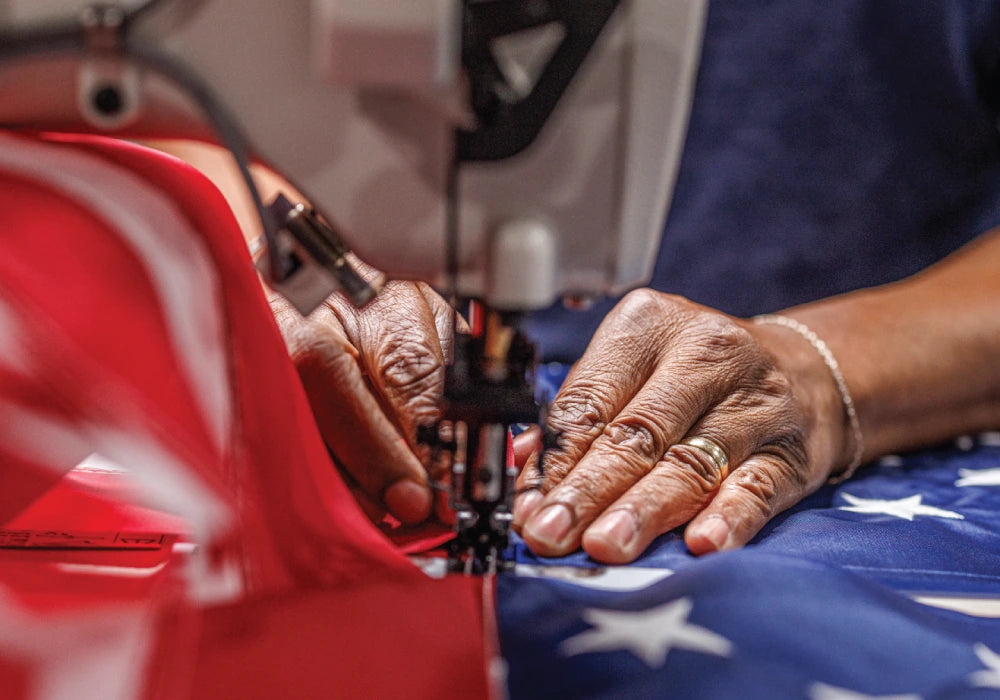
The creation of the blue canton and the precise application of stars are defining elements of sewing an authentic American flag. Begin by selecting a high-quality, colorfast blue fabric that will maintain its deep hue over time. Carefully measure and cut the canton so that it spans the height of seven stripes and the correct width, ensuring alignment with official flag proportions. For the stars, use a durable white fabric and a template or stencil to cut out 50 uniform five-pointed stars. To achieve even spacing and proper alignment, create a placement guide or template marking the positions for each star in the required nine-row pattern, alternating rows of five and six stars. Secure each star onto the canton with pins before stitching. The appliqué technique is highly recommended for attaching the stars, as it provides both durability and a crisp, professional finish. Hand— or machine-sew around the edges of each star with tight, even stitches to prevent fraying. After all stars are attached, inspect the canton for symmetry and uniformity, ensuring the arrangement honors the flag’s symbolism and craftsmanship.
Assembling the Flag
After the stripes are assembled, the next step is to attach the union to the flag. The union should be aligned with the top left corner, overlapping the first seven stripes. Pin the union in place carefully to prevent any shifting during sewing. Use a fine stitch to securely attach it, ensuring the edges are neat and lie flat against the stripes. This step is critical in maintaining the flag's proportion and symmetry, vital aspects of its iconic design. Adding the 50 stars to the union is a meticulous process that requires attention to detail. Here is a step-by-step approach to ensure precision:
- Create a template for the star arrangement on the flag, adhering to the official star arrangement on flag guidelines.
- Cut out 50 stars from white fabric. You can use a stencil for uniformity.
- Arrange the stars on the union based on your template. Adjust their positions until they are evenly spaced.
- Pin each star in place to prevent movement during sewing.
- Carefully sew each star onto the union, using either a machine or hand stitching. The appliqué technique is recommended for a polished look.
Ensuring precision in the star arrangement is crucial for an authentic representation of the American flag. The stars should form nine rows of alternating counts of five or six. Use a ruler or a custom template to place each star at equal distances from one another. This uniformity is not only a matter of aesthetic appeal but also a sign of respect for the flag's symbolism. It's a time-consuming process, but the attention to detail here is what separates a handmade flag from a mass-produced one. Remember, each star represents a state, so their accurate placement honors the unity and diversity of the United States.
Finishing Touches
Hemming is a crucial step in ensuring your flag's longevity and resilience, especially if it will be flown outdoors. Begin by folding the edges of the flag to create a clean, straight hem. This fold should be narrow yet sufficient to prevent fraying. Pin the hem in place, then use a sewing machine or hand-stitch with durable thread. The goal is to create a hem that is both strong and discreet, not detracting from the flag's appearance. This process not only enhances the flag's durability but also gives it a polished, professional look. On the other hand, grommets are essential for securely hanging the flag and should be added with care. Here’s a step-by-step guide:
- Determine the placement for the grommets, typically at the top and bottom of the flag's hoist side.
- Reinforce the area where the grommets will be inserted with extra fabric or interfacing to ensure they hold up against wind and wear.
- Mark the exact spots for the grommets and cut small holes carefully.
- Insert the grommets into the holes and use a grommet tool to secure them in place.
The appliqué technique for stars is a detail-oriented process that adds elegance to your flag. Each star is individually sewn onto the union, ensuring they lie flat and remain secure. To achieve this, first pin each star precisely in its designated spot. Using a fine needle and white thread, sew around the edges of each star with small, tight stitches. This method not only secures the stars but also creates a subtle raised effect, enhancing the flag's texture and visual appeal. Adding final touches, such as hemming, reinforcing seams, and other details, to complete the flag.
The last step in your flag-making journey is a thorough final inspection. Examine every inch of your flag for quality and accuracy. Ensure all seams are straight, the stars are evenly placed, and the colors are vibrant. This inspection isn’t just about ensuring the flag looks good; it’s about respecting the symbol you’ve worked hard to create. A well-made flag reflects your craftsmanship and honors the significance of the American flag.
Maintenance and Etiquette
Proper care and maintenance are crucial for preserving your flag's appearance and longevity. Here are some valuable tips for American flag maintenance:
- Clean the flag regularly to remove dirt and pollutants, using mild detergent and lukewarm water.
- Avoid exposing the flag to harsh weather conditions like heavy rain, snow, or extreme sunlight for prolonged periods.
- Inspect the flag often for signs of wear or damage, particularly along the seams and at the ends.
- Repair minor tears and fraying edges promptly to prevent further damage.
- If the flag becomes too worn or damaged, retire it respectfully according to the United States Flag Code.
Remember, the American flag is more than just a piece of fabric; it's a symbol of the nation's values, history, and people. When sewing, displaying, or storing the flag, do so with a sense of reverence and respect. Understand that each aspect of the flag, from its star arrangement on the flag to the way it’s hung, carries deep meaning and should be treated with the utmost respect. This mindfulness ensures that the flag continues to be a powerful symbol of national pride and unity.
Crafting an American flag is a journey filled with pride and satisfaction. From selecting the right materials for American flag-making to mastering the appliqué technique for stars, each step offers a unique opportunity to engage with a meaningful symbol of national identity. It's a project that goes beyond the realms of a simple sewing task, embedding within it a deeper connection to the country's heritage. As you hoist the flag you've meticulously created, let it serve as a reminder of the skills you've honed, the patience you've exercised, and the respect you've shown for this emblem of freedom and unity. Whether displayed in your home, school, or community center, your handmade American flag is a testament to your dedication and a beacon of American pride. If you prefer to honor this tradition with a professionally crafted flag, explore Allegiance’s USA-made American flags and fly one created by skilled American artisans with unmatched quality and respect.