


The American flag, often referred to as the Stars and Stripes, Old Glory, or the Star-Spangled Banner, is not just a piece of fabric. It's a symbol of national pride, freedom, and history. Each element of the flag has its meaning: the 50 stars represent the states of the Union, while the 13 stripes recall the original 13 colonies. The colors are symbolic: red symbolizes courage and bravery, white purity and innocence, and blue vigilance, perseverance, and justice. Crafting the American flag, therefore, is not just about creating a national emblem; it's about weaving a piece of American history and values.
Materials Used in Flag Making
Nylon: Durability and Weather Resistance
Nylon is a popular choice for flag-making due to its exceptional durability and resistance to weather elements. This synthetic fabric is lightweight yet strong, allowing it to fly gracefully even in mild breezes. Nylon's resistance to sun, rain, and wind makes it ideal for outdoor flags. Its fibers are specially treated to resist fading, ensuring the flag's colors remain vibrant over time. Nylon is often the preferred material for American flags intended for prolonged outdoor display.
Polyester: Cost-Effectiveness and Versatility
This material is known for its versatility, as it can be used in a wide range of climatic conditions. Polyester is heavier than nylon, making it suitable for high-wind areas where a more durable flag is necessary. Its robust nature means that it doesn't wear down easily, ensuring longevity. For budget-conscious consumers or institutions ordering American flags online in bulk, polyester is an advantageous option that doesn't compromise on quality.
Cotton: Traditional Appeal and Texture
Cotton brings a traditional touch to flag-making, favored for its classic look and feel. This natural fiber offers a rich, matte texture that is visually appealing, especially for ceremonial or indoor flags. While not as weather-resistant as nylon or polyester, cotton flags hold a special place due to their authentic appearance and historical significance. Cotton flags are often sought after by collectors and enthusiasts who buy the American flag online for display purposes, valuing its aesthetic and tactile qualities.
The Flag Manufacturing Process
Cutting and Dyeing: Ensuring Vibrant Colors
The first step in manufacturing the American flag involves precise cutting and dyeing of the materials. High-quality dyes are used to ensure that the red, white, and blue colors are vivid and long-lasting. The fabric is cut into the required shapes – stripes and a blue canton for the stars. Advanced machinery is often used for cutting to ensure dimensional accuracy, which is crucial for adhering to the strict guidelines set by the U.S. Flag Code. The dyeing process is carefully monitored to prevent color bleeding and to ensure uniformity in the shades used.
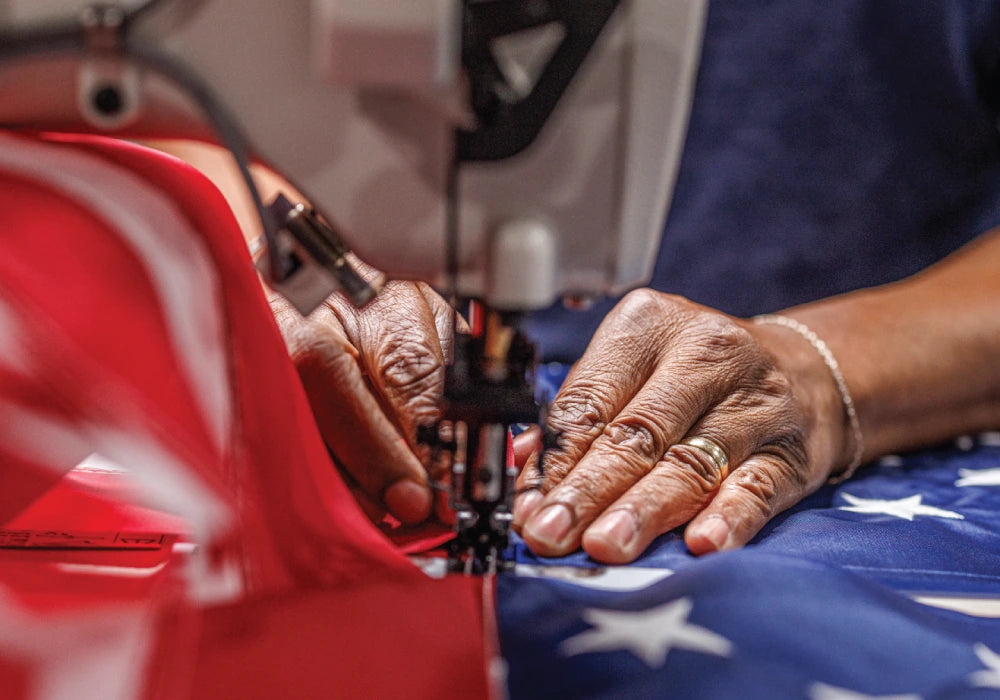
Sewing Techniques for Stripes and Star-Spangled Canton
Stripes and star-spangled cantons are fundamental elements of many flags, notably the American flag. Sewing these patterns requires precision and careful technique to ensure a professional and durable result. The following tips and techniques will guide you through the process of creating a neat and visually appealing design.
-
Pre-Wash Fabric: Always pre-wash your fabrics to prevent shrinkage and color bleeding, especially when dealing with red and white stripes.
-
Measure Precisely: Use a ruler or measuring tape for precise measurements. Accuracy is crucial for stripes to ensure they are even and straight.
-
Ironing: Iron the seams flat between each stripe to maintain a neat appearance. Use a low heat setting appropriate for your fabric.
-
Reinforcing Edges: Reinforce the flag's edges, especially if it's intended for outdoor use. This helps in preventing fraying.
-
Finishing Touches: Check for any loose threads and trim them. Ensure all stars and stripes are securely attached and aligned.
After mastering these sewing techniques, you'll be able to create beautiful and durable striped patterns and star-spangled cantons. Whether you're making a flag or incorporating these designs into other projects, the key is patience and attention to detail. With practice, your stripes will be perfectly parallel, and your stars will sparkle with precision, making your sewing project a source of pride and satisfaction.
Precision in Alignment of Stars and Stripes
The U.S. Flag Code specifies the exact arrangement and size of these elements. Advanced technology enables this precision, with computer-aided design (CAD) systems ensuring that the placement of every star and stripe adheres to the prescribed specifications. This precision guarantees a uniform and standardized look for every flag produced, a crucial aspect when individuals look at how to make the American flag.
Stitching for Durability and Longevity
The stitching of the flag is not merely about piecing fabric together; it’s about ensuring durability and longevity. Specialized threads and stitching techniques are used to make the flag sturdy enough to withstand various environmental conditions. Double or triple stitching is commonly employed on hems and joints, providing extra strength to these high-stress areas. This meticulous approach to stitching is vital for the flag’s longevity, especially important for those displayed outdoors.
Evolution of Flag-Making Technology
From Hand-Sewing to Modern Manufacturing
The journey of flag-making has evolved remarkably over the centuries. Initially, flags were hand-sewn, a labor-intensive process requiring significant time and skill. Today, modern manufacturing techniques have transformed this process. Automated sewing and assembly lines have increased production efficiency, allowing for the mass production of flags. This evolution has also led to more consistent quality across flags, ensuring each one meets the high standards set by the U.S. Flag Code. The distinction between handcrafted and mass-produced American flags lies in the level of craftsmanship and artisan involvement. Handcrafted flags are meticulously assembled by skilled artisans who devote attention to every stitch, often using traditional hand-sewing techniques that result in superior durability and unique character. These flags may feature custom details or reinforced finishes, reflecting the pride and expertise of their makers. In contrast, mass-produced flags rely on automated machinery for rapid, large-scale production, prioritizing efficiency and affordability. While machine-made flags offer uniformity and accessibility, they often lack the personalized touch, intricate detailing, and lasting quality found in artisan-crafted flags.
Automated Cutting and Assembly
Automation has significantly streamlined the cutting and assembly stages of flag manufacturing. Computer-controlled cutting machines precisely slice fabrics into the required shapes and sizes, reducing material waste and improving accuracy. Automated assembly lines then piece together the stripes and attach the canton seamlessly. This automation not only speeds up the production process but also minimizes human error.
Quality Control in Modern Flag Making
To guarantee the enduring quality and longevity of American flags, manufacturers implement a comprehensive set of quality control and inspection measures throughout the production process. Each flag undergoes multiple inspections at key stages, from the selection of high-quality fabrics to precise cutting, dyeing, and assembly. Skilled inspectors examine every flag for defects such as uneven stitching, color inconsistencies, or misaligned stars and stripes, ensuring strict adherence to established specifications. Reinforcement techniques play a crucial role in extending the flag’s lifespan. Double or even lock stitching is often used along seams and edges to prevent fraying, especially in high-stress areas exposed to wind and weather. Additional methods, such as bar tacking at grommet points and applying reinforced corner patches, provide extra strength where it is most needed. Some manufacturers also employ splicing for rope attachments, ensuring a secure and durable bond that withstands repeated raising and lowering. Only flags that pass these rigorous inspections and incorporate these reinforcement features are approved for sale, reflecting a deep commitment to craftsmanship and national pride. Careful attention to quality and durability ensures that each American flag remains a vibrant, resilient symbol of the nation, capable of withstanding the elements and the test of time.
DIY American Flag Making
Basic Materials and Tools Needed
You'll need a ruler or measuring tape for accurate measurements, sharp scissors for clean cuts, and sewing supplies like a needle, thread, and possibly a sewing machine. Fabric glue can be an alternative for those less skilled in sewing. Additional tools might include a fabric marker for outlining the stars and stripes, and as mentioned previously, an iron to ensure the fabric is smooth and wrinkle-free before you start.
Step-by-Step Guide to Making a Flag at Home
Crafting your own American flag at home is not only a creative endeavor but also an expression of patriotism and personal craftsmanship. It's a project that allows you to connect with the history and values of the United States through the very act of making one of its most recognized symbols. This step-by-step guide will help you through the process:
-
Measure and Cut the Stripes: The first step in creating your flag is to measure and cut the stripes. You'll need seven red and six white stripes, each 1.9 inches wide, to maintain the flag's standard proportions. Precision in measuring and cutting is crucial to ensure that the stripes are uniform, which will contribute to the flag's overall symmetry and aesthetic appeal.
-
Prepare the Canton: Next, you need to cut a blue rectangle, known as the canton, that covers the top left quarter of the flag. The dimensions of the canton should be proportionate to the rest of the flag, following the official flag specifications. This step requires careful measurement and cutting to ensure the canton fits perfectly with the stripes.
-
Create the Stars: There are various techniques used to apply stars and stripes to the flag, including embroidery, printing, and stitching methods. The stars on the flag represent each state in the Union. You can create these stars by cutting or drawing 50 small white stars, using a stencil for uniformity. Depending on your skill level and the tools at your disposal, you can choose to sew or embroider the stars or use fabric glue as a more accessible alternative.
-
Assemble the Flag: Now comes the assembly. Start by sewing or gluing the stripes together in an alternating red and white pattern. This step is key to the flag's appearance, requiring careful alignment and attachment. Then, attach the canton over the top of the first seven stripes on the left, ensuring it's properly aligned with the stripes.
-
Attach the Stars: Arrange the stars in nine rows of alternating numbers (six and five) on the canton. Secure them in place, being mindful of their alignment and spacing. This step requires patience and attention to detail, as the stars are a focal point of the flag.
-
Finish the Edges: Hemming the edges of the flag is essential, especially if it will be used outdoors. This step adds durability and prevents fraying, ensuring your flag can withstand the elements and display beautifully for a long time.
-
Inspect Your Work: Finally, inspect your flag for any inconsistencies, missed stitches, or misaligned elements. This quality check ensures that your flag not only meets your standards but also respects the emblematic significance of knowing how to make the U.S. flag.
Making an American flag at home is a process that combines precision, creativity, and a sense of national pride. Each step, from cutting the stripes to the final inspection, is an opportunity to engage with an important national symbol, resulting in a flag that is not only visually appealing but also personally meaningful.
Safety Precautions in Flag Crafting
When sewing, be cautious with sharp needles and scissors. If you're using a sewing machine, familiarize yourself with its operation to avoid accidents. When cutting fabric, do it on a flat, stable surface. Keep your workspace organized and free of clutter to prevent mishaps. If you're involving children in the project, supervise them closely, especially when using sharp tools or hot equipment like irons.
Purchasing American Flags
Certification and Authenticity
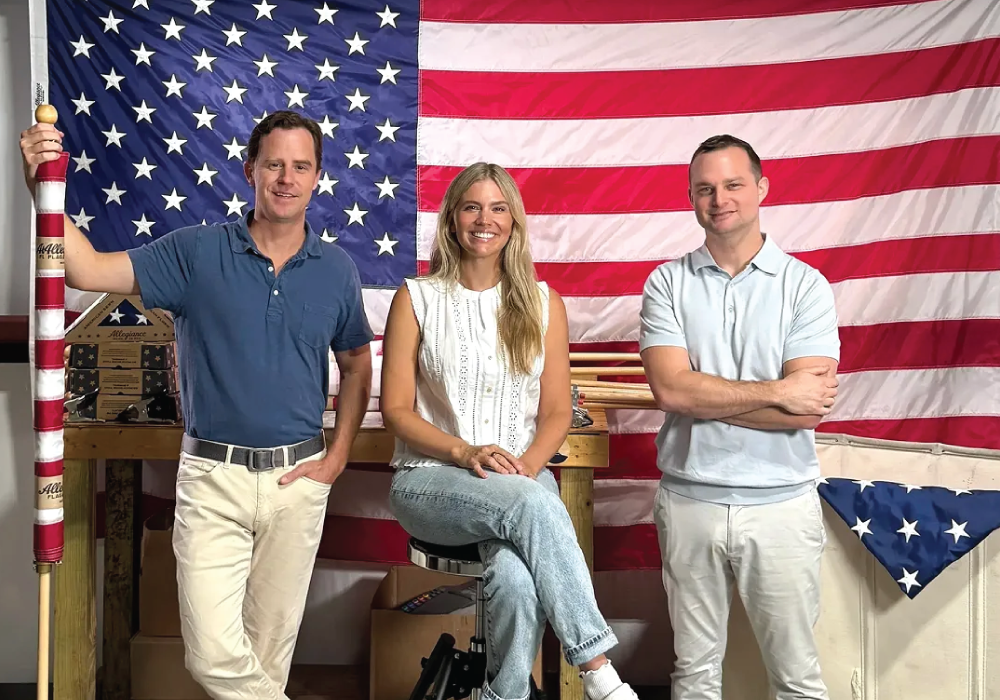
When purchasing an American flag, verifying its origin and certification is crucial to ensure you are honoring the true spirit of the emblem. Authentic American flags should be made in the USA, reflecting national pride and supporting domestic manufacturing. One of the most reliable ways to confirm a flag's authenticity is by looking for FMAA (Flag Manufacturers Association of America) certification. The FMAA label guarantees that the flag has been entirely manufactured in the United States, using domestically sourced materials and adhering to strict quality standards. This certification not only assures buyers of the flag’s origin but also its craftsmanship and ethical production. Choosing a certified, American-made flag means supporting American workers, upholding high labor standards, and contributing to the local economy. Certified flags are more likely to meet the official specifications and durability required for long-term display. By prioritizing flags with verified origin and certification, individuals and organizations demonstrate respect for the flag’s symbolism and the values it represents, ensuring their display is both patriotic and principled.
Where to Buy High-Quality Flags Online
For those who prefer to purchase rather than create their own flag, numerous online platforms offer high-quality American flags. When seeking to buy the American flag online, it's important to choose reputable retailers who guarantee authenticity and compliance with the U.S. Flag Code.
Identifying Reputable U.S. Flag Shops
Identifying a reputable U.S. flag shop involves a few key steps. Look for shops with positive customer reviews and ratings. It's also beneficial to choose stores that provide detailed information about their flags, including fabric type, sizing, and manufacturing details. Reputable shops often have knowledgeable customer service teams who can answer questions and provide guidance, ensuring that you make a purchase that meets your needs and expectations.
Whether you are a DIY enthusiast eager to embark on the journey of flag-making or someone looking to proudly display a purchased flag, the journey of knowing how to make an American flag is filled with significance and pride. It is a journey of connecting with the nation’s history, embracing its values, and contributing to the tapestry of patriotism that weaves the American spirit. Show your pride with a beautifully crafted, U.S.-made flag by choosing a premium option from Allegiance today.